 IT2EDU Empowering Education Through Technology
Related Articles
SINGLE-NODE [STANDALONE] CLUSTER INSTALLATION
The report here will describe the required steps for setting up a single-node Hadoop cluster backed by the Hadoop Distributed File System, running on Ubuntu Linux
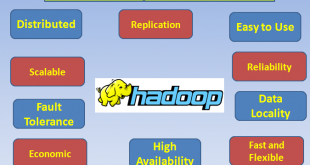
Hadoop is a framework written in Java for running applications on large clusters of commodity hardware and incorporates features similar to those of the Google File System (GFS) and of the MapReduce computing paradigm.
Hadoop’s HDFS is a highly fault-tolerant distributed file system and, like Hadoop in general, designed to be deployed on low-cost hardware. It provides high throughput access to application data and is suitable for applications that have large data sets.
Prerequisites
System Requirements
| Operating System | Ubuntu 64bit (Recommended) |
|---|---|
| RAM | 2GB + |
| HDD | 40GB + |
Install Java
Hadoop requires minimum 1.6+ (aka Java 6) installation. Check if java is already installed or install it using sudo apt-get command in the terminal. We have used Oracle Java-8.
Step 1 : Check if Java is Installed
java -version

If not Installed, Install openjdk or Oracle Java 7 or 8,in our demo we have installed oracle -8.
Step 2 : Clone ‘ppa:webupd8team/java’ repository, Update Source List and install Java 8
sudo add-apt-repository ppa:webupd8team/java
sudo apt-get update
sudo apt-get install oracle-java8-installer
Check if Java is correctly installed using step 1 command.
Configuring SSH:
The hadoop control scripts rely on SSH to peform cluster-wide operations. For example, there is a script for stopping and starting all the daemons in the clusters. To work seamlessly, SSH needs to be setup to allow password-less login for the hadoop user from machines in the cluster. The simplest way to achive this is to generate a public/private key pair, and it will be shared across the cluster. Hadoop requires SSH access to manage its nodes
Generate an SSH key
ssh-keygen -t rsa -P ""Note:
- P “”, here indicates an empty password.
- If asked for a filename just leave it blank and press the enter key to continue.
Enable SSH access to your local machine with this newly created key which is done by the following command.
cat $HOME/.ssh/id_rsa.pub >> $HOME/.ssh/authorized_keysStep 4 : The final step is to test the SSH setup by connecting to the local machine with the hduser user. The step is also needed to save your local machine’s host key fingerprint to the hduser user’s known hosts file.
ssh localhost
Installation
1 Install Hadoop
Step 1 : Download the hadoop installation file [bin file] from official Apache website and extract and do it with the following commands.
sudo wget https://www-eu.apache.org/dist/hadoop/common/hadoop-2.9.2/hadoop-2.9.2.tar.gz
Step 2 : To extract this tar file use following command
tar xvzf hadoop-2.9.2.tar.gz
Step 3 : Move the extracted Hadoop installation Folder to the /usr/local/ directory using the following command
mv hadoop-2.9.2 /usr/local/
Step 4 : Change the permission of hadoop-2.7.2 to dedicated user acccount.
sudo chown -R <user>:<user_group> /usr/local/hadoop-2.9.2/ Setup Environment Variables for Hadoop
Step 1 : Open ~/.bashrc File to add Environmental variables using following command
vi ~/.bashrcStep 2 : Add the Following lines at the end of ~/.bashrc file.
| export JAVA_HOME | /usr/lib/jvm/java-8-oracle | It is the path of Java – JDK installed in library folder |
|---|---|---|
| export HADOOP_INSTALL | /usr/local/hadoop-2.9.2 | Path of Hadoop folder |
| export PATH | $PATH:$HADOOP_INSTALL/bin:$HADOOP_INSTALL/sbin | To run cmd directly from anywhere |

Step 3 : Execute ~/.bashrc file.
source ~/.bashrcStep 4 : Check if Hadoop installed correctly
hadoop version
Step 5 : Append following lines to the hadoop-2.9.2/etc/hadoop/hdfs-site.xml
The hdfs-site.xml file needs to be configured
<configuration>

<property>

<name>dfs.replication</name>

<value>1</value>

</property>

<property>

<name>dfs.namenode.name.dir</name>

<value>file:/usr/local/hadoop-2.9.2/namenode</value>

</property>

<property>

<name>dfs.datanode.data.dir</name>

<value>file:/usr/local/hadoop-2.9.2/datanode</value>

</property>

</configuration>
Step 4 : Set JAVA_HOME in hadoop-2.9.2/etc/hadoop/hadoop-env.sh file
export JAVA_HOME=/usr/lib/jvm/java-8-oracle
Append the following lines to the hadoop-2.9.2/etc/hadoop/core-site.xml
<configuration>

<property>

<name>fs.default.name</name>

<value>hdfs://localhost:9000</value>

</property>

</configuration>
Format Hadoop File system
$hadoop namenode -format
start the daemons
$start-all.sh

To check all the running services nodes
jps

Web UI of the NameNode daemon, after starting single-node cluster
http://localhost:50070/ 
Web UI of the Job HistoryServer daemon, after starting single-node cluster
http://localhost:19888/